Introduction:
Here is a tutorial on a technique I discovered for making modeling with Blender's sculpt tools and multires objects feel more like working with real clay. And the best part is that since you already have a computer, you save a couple of bucks by using digital clay since Blender is free! Shut up, I know I'm cheap.
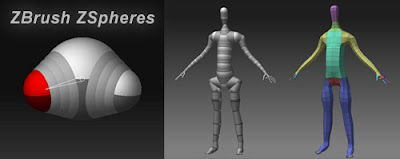 I stumbled onto this way of working while trying to come up with a simple way to quickly block out a character for sculpting, similar to ZBrush's ZSpheres. There's a script someone wrote with the same basic idea in mind, but I wanted something faster and more intuitive.
This process should be friendly for those who are more comfortable with grabbing a chunk of clay and forming it with you hands, rather than selecting vertices, extruding, cutting edge-loops, and other such processes. My real hope is that a talented traditional artist friend of mine will be able to use this tutorial to quickly learn cg sculpting a make some really cool stuff for me to drool over. That said, I do assume that you have a basic understanding of how Blender's interface is laid out, how to create and transform objects, and a wacom tablet would be helpful as well.
Getting started:
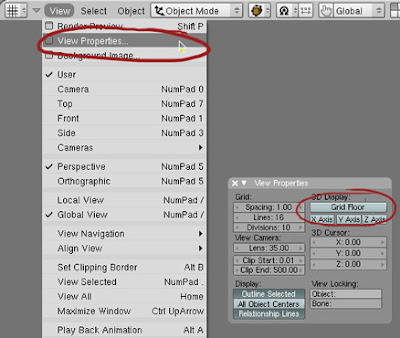
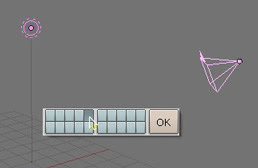 To begin, open a new scene in blender. Let's clean up the scene a little by selecting the lamp and camera in the scene, press M to move them to a different layer and click on the fifth layer from the left to place the objects. Go back to layer 1 and delete anything else. You may also want to do is get rid of the grid by opening the View Properties and turning off the Grid Floor and X & Y axises.
To block out our character, we're going to use an object type that is probably the least used/useful of any known to man. Give it up for...Metaballs!
Meta blocking:
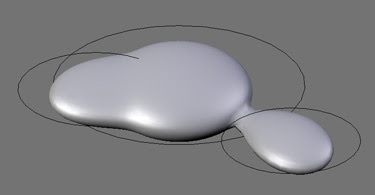
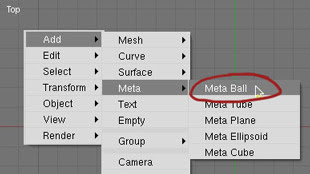 Go into the top view (important), press Space and add a metaball. Metaballs are a nifty, ancient piece of 3D technology that is useful for creating blobs. (Similar to lumps of clay, eh?) You create simple primitive shapes and scale and rotate them to block out your character's shape. When the primitives come close to one another, they bleed into one another the way water droplets merge when they touch. Cool.
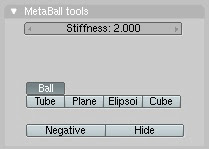
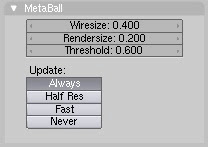 Remember that Blender jumps out of Object mode into Edit mode when you create an object, so press Tab to switch back to Object mode. You won't be able to scale your Meta primitive non-proportionally in Edit mode. In Object mode, you can change these options for the entire Meta object, while tabbing into Edit mode gives you more options for the selected meta primitive, such as changing the type from Ball to Tube, Plane, Cube, etc. and you can also make Negative metas .
  Press Shift-D to duplicate the Metaball and place it where you like. Continue blocking out your character, building enough blobs to represent the limbs or forms you will need to sculpt your masterpiece. Don't get carried away by putting in too much detail at this stage, use as few shapes as you need. This is supposed to be quick and fun, after all.
Meta mess!
Now that you've got something that resembles what you're after, select all the Metaballs and (object mode) type Alt-C to convert it to polygons so you can actually do something with your blob.
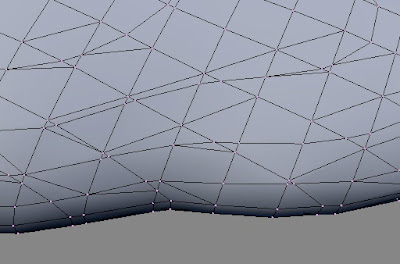 Delete any of those black rings left over from the metas and select your new polygon mesh. If you Tab into Edit mode you will see terrifying ugliness instead of nicely gridded mesh. "Certainly, we can't be expected to create anything useful out of this!" you shriek. Take it easy, my friend. It's time to add a Decimate modifier.
The Decimate modifier will do two things for us. It's primary job is to reduce the poly count of a mesh.
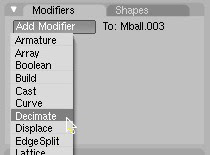 A pleasant side effect for our purposes is that it will begin to rearrange the topology into a more manageable heap of triangles and quads. Keep reducing the Ratio slider below 0.5 until it becomes as coarse as you can stand. You want the lowest polygon base you can have that still maintains enough detail in the limbs and shapes you made with the Metaball phase. One thing to watch for is that this process sometimes creates holes as it does its best to simplify the mesh. I find that usually you can slightly change the Ratio to fix the problem, but if you're still finding holes, check out the Tips & Tricks section at the end. So as you can see, this step greatly reduces the Face Count, which will be good later.
 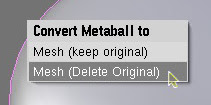 Next we need to get rid of those triangles as much as possible. Click Apply (in the modifier panel) and Tab into Edit mode. Press A until all of the vertices are selected (turn yellow) and hit Alt-J to convert the faces from triangles to quads, which will subdivide better. Now you should have something we can work with.
Beginning to sculpt:
 Right below the Modifiers section is the Multires panel. A multires object has the options to add numerous levels of smooth subdivision to a mesh. While you can use the sculpt tools on any polygon or nurbs mesh, the great strength of sculpting with Multires is the
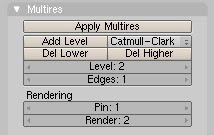 ability to jump back and forth to different levels--quickly changing gross form at lower levels, and adding finer detail at the higher levels. Add the Multires and Add a level. We're ready to sculpt.
In case you haven't noticed, Blender's different modes offer different tool sets and options. To make the sculpting tools available you need to be in Sculpt mode, accessible through the Mode drop-down in any 3D window header.
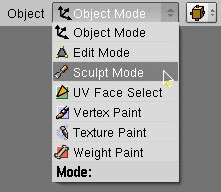 You'll see two new tabs next to the multires panel, Sculpt and Brush. Sculpt has most of the options you'll need to begin shaping your mesh. Note that most of the different brushes in this panel have hot-keys which will save a lot of time(G=Grab, D=Draw, S=Smooth, etc.). Most important here is changing the brush size and intensity. Pressing F and dragging the mouse will resize the brush, while Shift-F will allow you to adjust the Brush Intensity. You can also turn on Symmetry to paint, for instance, both sides of a face at one time. This can speed up tasks tremendously,
 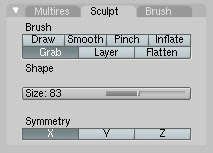 as long as your mesh is aligned to the axis properly.
The Steps Overview:
-Create Metaballs, duplicate, move, scale, rotate
-Convert to Polygon via Alt-C (delete original)
-Apply Decimate modifier
-Quads via Alt-J in edit mode
-Apply Multires, add a level
-Switch to Sculpt Mode and sculpt away!
Conclusion:
I think that's about enough to get started with your new-found free digital clay. Check out the links in the Tips and Tricks section for further exploration. Let me know if you find this tutorial is useful. While I've used many 3d packages over the past decade, I've only been using Blender for a few weeks, so I'm certainly not an expert. If you really want to learn blender's tools, go through the tutorials and user manual at wiki.blender.org and happy sculpting!
~joe
TIPS & TRICKS
Repairing holes from the decimate modifier:
Holes happen. Here's how to fix them. If you've already added a multires, go back to level 1 and click Apply (you will loose any sculpted detail on higher levels). Tab into Edit mode and select 3 or 4 vertices on the hole's edge and press F to create a face across those verts. Continue the process until the hole is filled. Type A to select all the verts and then Alt-J to convert to quads. Problem solved.
Need more subdivision!
Sometimes you just need more subdivision in specific areas like the hands and face of a character and don't want it everywhere. A simple way to add some more polygons to those areas is to drag a selection around the verts in question (B key) and press W. From the menu that pops up, select Subdivide Smooth. Tab out of edit mode and move on to the Beginning to Sculpt section of the tutorial.
Tools that will make your entire life easier:
-Alt-B -- commit this to memory.
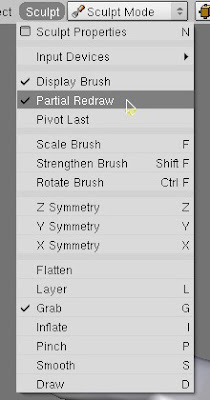 It allows you to drag a box around an area of mesh to isolate a specific area. This is great for getting those hard to reach places inside a mouth, or for adding detail to an area while keeping the redraw time down.
-Partial redraw -- here is an option in the Sculpt menu that I switch on at times when I'm working with really dense mesh, it works it's magic to draw really dense mesh more quickly. Yay.
-Set Smooth / Set Solid -- these buttons are helpful.
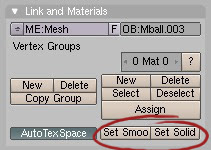 I usually sculpt with the edge normals set to Solid so you can really see the changes you're sculpting into your mesh. Set Smooth will remove the facets and give you a better picture of how it will render.
Videos & Tuts:
-Check out this youtube video to watch a head sculpting screen capture.
-Here is a Tutorial containing info about adding texture to your sculpt brushes.


12 comments:
This is one thing I've been really wanting to learn. Your pelicans inspired me to use this tutorial to make the pink flamingos I've got on my project list.
Nice tutorial! Having not used blender for a couple years, I found myself needing to do some quick sculpting. With your help, this took minutes, not hours. Thanks!
one bad thing that has ALWAYS hampered metaballs as modeling tools is that they resolve into triangles... if they can figure out a way to create nice, evenly subdivided quad meshes with metaballs - in terms of functionality and ease of use they would blow zbrush's zsphere's (which is kind of like quaded metaballs with limitations) out of the water.
but the quad thing is a big deal.
There is a way for correcting the problem with triangles in your mesh. you can use the retopology tool to paint new verts over a sloppy mesh like a metaball structure thus changing the topology but not the basic shape of the model. This takes more time but apparently it is pretty easy to do and a low-poly sculpt/retopo work pipeline is getting more and more popular... It's top on my to do list of Blender modeling training.
Take it easy and good luck,
Rob
yeah, retopo is a way to go. but dang it if metaballs would really get useful if they just resolved into an even quad mesh! that would be soooooo sweet. but i guess there must be a ton of technological hurtles to that since the closest thing going (in 2008!) is zspheres....
Yeah I like metaballs...well I have been tryin to makes stuff with them for a few years but my projects never get finished
Hey everyone, some great comments here. A big thanks to the folks at Blendernation for posting my little tut. There is some great discussion on the Blendernation post as well, especially Bmud's comment about using smoothteddy.
I totally agree about the quads issue. At this point the most logical workflow is to use your quickly sculpted mesh as a template for the final, well-edgelooped mesh. Whether that's using retopo or not.
It would be incredibly amazing if there were some sort of system for quadded metaballs-ish objects--start with one ball and extrude more from that initial one. Anyone have any thoughts about the possibility of something like that?
cheers
well i think that blender has a face converter...but I tried it with metas...and it doesn't convert all the faces to quads some still stay triangles...but I think that you could go the other way and make all quads triangles..
Bythe way i think in most game design you count faces as triangles and not quads..
One of the best (if not the best)
tutorials of its kind, ty man!
gr8 tute, but where's the digital clay??? man, that was nothing like what i had expected...i thought it would be something like clicking and holding the mouse button to push it in, and out.but overall, you have done a good job explaining...but i wanted something to do what i want it to do...like ACTUAL clay...isnt there any way? :((
Actually, if you want to just click and hold the mouse to push and pull, select Draw mode in the sculpt panel and turn on Airbrush. With that on, as long has you have the mouse button pressed, it'll keep pulling outward. Shift clicking will push the mesh inward. I find Grab to be the most intuitive for gross reshaping, and to me it feels most like manipulating actual clay.
This is the great post for the learn different techniques for making modeling. So All are available in this post like the begging and the ending of this process, tips and trick are also available.
Post a Comment